Library Catalog Kiosk Stations, Free with Linux (Part 2) - Install the OS
Phil Neilson
•
24 August 2025
•
7 mins
Posts in this Series:
- Library Catalog Kiosk Stations, Free with Linux (Part 1)
- Library Catalog Kiosk Stations, Free with Linux (Part 2) - Install the OS
- Library Catalog Kiosk Stations, Free with Linux (Part 3) - Install and Configure Utilities
- Library Catalog Kiosk Stations, Free with Linux (Part 4) - Create Kiosk Script & Custom Session
The first step toward building your kiosk station is to install a fresh OS on the machine, and this post will walk you through this step. If you already are familiar with installing Linux on a computer, skip to Part 3.
I recommend and will be using Linux Mint 22.1 Cinnamon Edition. I like Mint because it’s beginner-friendly (it has a fairly familiar visual setup if you are used to Windows), is not demanding on hardware (they say it will run on 2 GB of RAM but recommend 4 GB), and has good community support. If you’re wondering “why Linux?” instead of just using Windows, here are a few reasons:
- It’s free.
- It’s open source and set up to be highly customizables.
- It’s lightweight and can run on older hardware.
- It’s secure and less open to attack than a Windows system which comes running a bunch of unwanted/unknown services and applications out of the box.
If you haven’t ever tried out Linux, I would highly encourage you to do so, and Linux Mint is a great first distribution to work with.
Step 1: Download Linux Mint 22.1 Cinnamon Edition and create a bootable USB
For this step, you’ll need a USB flash drive (4 GB minimum) that is either empty or doesn’t have data that you want to keep on it. This first step can be done on any computer; it doesn’t necessarly have to be the computer you’re setting up to be the catalog station.
First, visit the Linux Mint Website and click Download. Select the Cinnamon Edition and then select one of the Download mirrors to download the ISO file.
A note: if you’re using an older PC for this process, you might want to consider choosing the Xfce edition of Linux Mint instead, or for that matter you could try Xubuntu or Lubuntu for very old hardware. These should all run a bit faster on your computer, but then some of the following steps will be a bit different, especially setting up the custom xsession.
Second, download Rufus, which you’ll use to write the ISO image to your USB flash drive and make it bootable. I used the standard rufus-4.9.exe version.
Once your two downloads are complete, put your flash drive in the computer, navigate to your Downloads folder, and open the Rufus file you downloaded. The exe file will run without needing to be installed.

- In the Device menu, select your USB flash drive.
- In the Boot Selection menu, click Select and then navigate to your Downloads folder and select the ISO of Linux Mint that you just downloaded.
- In most cases, you can leave all the other settings as they are.
- Click Start at the bottom. You’ll be asked what mode you want to write your image in: select “Write in ISO image mode”. You’ll also get a warning that all your existing data will be erased.
- Once your USB is ready, the status bar will read READY and you can then click Close.
Step 2: Boot to USB
Insert your newly-made USB flash drive into the computer that you’re setting up to be a catalog station. The computer should be powered off. You will now boot your computer and tell it to load the operating system image that is on the USB flash drive, rather than the computer’s hard drive. The process for doing this varies a bit from computer to computer and might take a couple of tries.
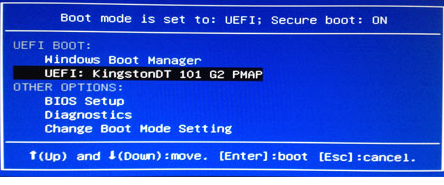
To open your computer’s boot menu, press the power button and then press the boot menu key on your keyboard. I was working on a Dell PC, so that key was F12 for me, but depending on the manufacturer of your computer, it could be different. Here is a list of boot menu keys for various computer brands. When the boot menu loads, you should see a list of bootable devices, and one of them should be your USB flash drive. In the image below, it would be the second option under “UEFI Boot”.
If you don’t see your USB device listed anywhere, it is probably due to your BIOS settings. You might have to do a little internet searching for solutions, as troubleshooting that is beyond the scope of this post, but start by checking the boot mode setting (Legacy BIOS or UEFI) and secure boot mode.
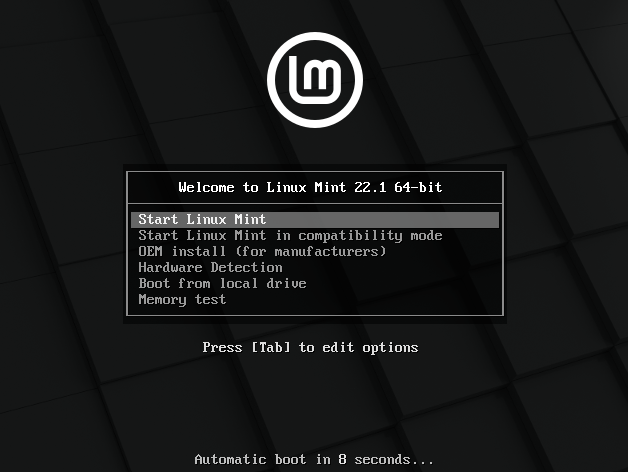
Once you select your USB device in the boot menu and hit enter, it should load the Linux Mint GRUB menu. Hit enter to select the first option, Start Linux Mint.
Step 3: Install Linux Mint
After a minute or two, you should see Linux Mint’s Cinnnamon desktop load.
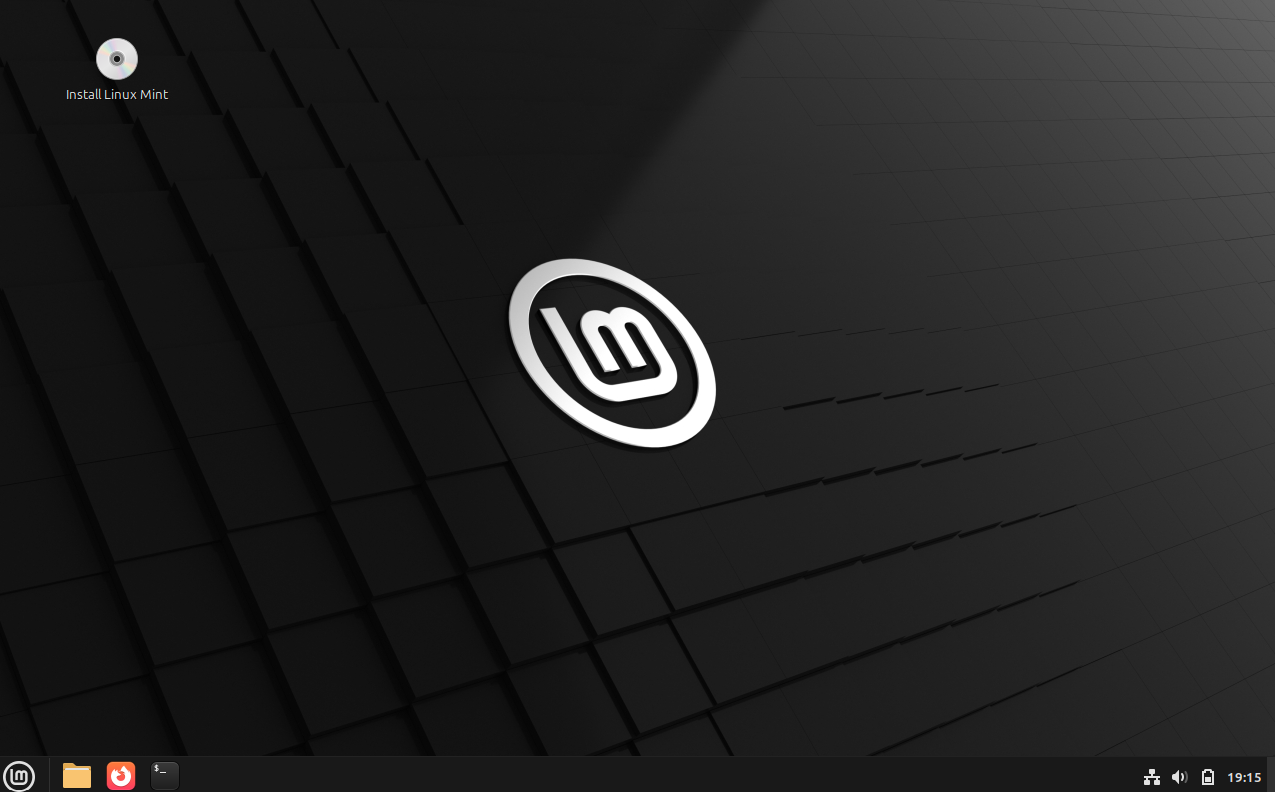
One of the cool things about working with a live USB image is that you’re running a complete, fully functional operating system live off of your USB flash drive right now. You can actually open programs, browse the internet, even install new applications during this live session, but the changes you make will not persist after you reboot. It’s a great way to try out a Linux distribution without installing it on your hard drive, though.
In this case we are going to actually install the OS onto the computer’s hard drive. Double-click the Install Linux Mint shortcut on the desktop. This will open up the installer, which is pretty straightforward. Walk through the steps to:
- Select your language.
- Choose your keyboard layout.
- Choose whether to install multimedia codecs (probably helpful if you were isntalling this to use the computer for a variety of tasks, but probably not necessary here; I left it unchecked).
- Choose your installation type (you probably want to choose “Erase disk and install Linux Mint” since this is a dedicated catalog machine–you don’t need another OS to boot to).
- You’ll get a warning message that this will erase your hard drive and install Linux Mint. Please take care that you’ve removed all data that you needed from your hard drive before you proceed.
- Set your time zone
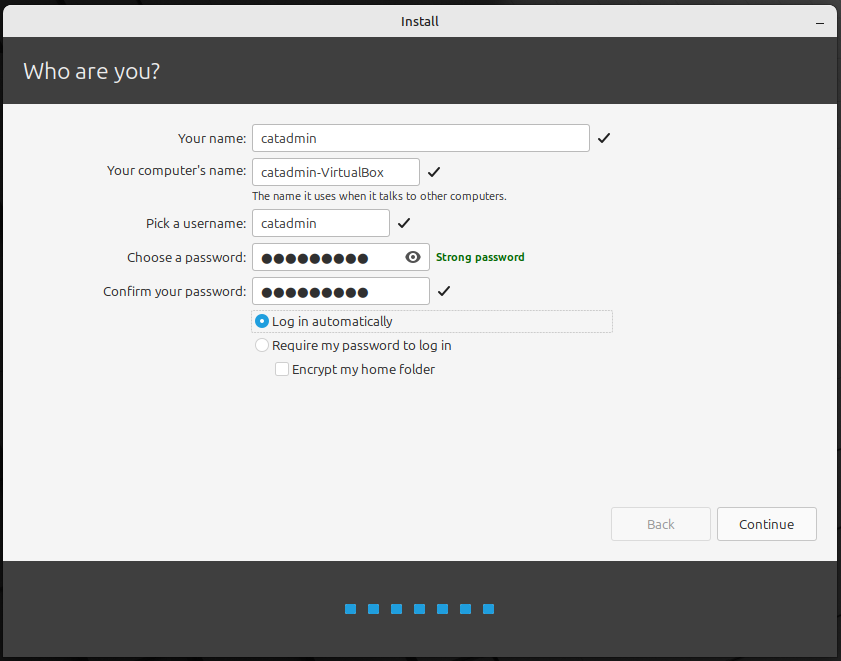
The final screen you come to will be a user account setup menu. I created an account called “catadmin”, kept the detault computer name it gave me, set a password, and set it to automatically login upon boot (this is helpful later on in the process). I did not choose the encrypt the home folder in this case.
The installer will take awhile to complete it’s installation process. When the process is complete, a menu will as you if you want to continue your live session or restart the computer. When you restart the computer, a screen will tell you to remove the installation medium and then press enter, and you can remove the USB flash drive at this point. Hit enter, and your computer should boot to your shiny new installation of Linux Mint on your hard drive!
Like it? Share it!